
There are various things that can cause the 'P1FFF - System Isolation / Coolant Level Sensor Fault' code to appear on your Chevy Volt but in my case it was because I had a small leak in my battery coolant radiator and the coolant levels dropped below the threshold acceptable by the sensor in the reservoir tank. This caused the Service High Voltage Charging System(SHVCS) warning to appear on my instrument cluster and I was unable to charge my car, a story told by many online. What isn't told by many online however is how these people managed to fix this problem themselves, particularly when it comes to situations where there is actually a coolant leak.
For those of you who are getting this code as a false positive because of issues with the sensor itself going bad, this guide will be useful to you. Although there has been some instruction available online, none of it was particularly detailed so hopefully you find this helpful. For anyone like myself whose SHVCS warning has occurred for good reason, this guide and the others I will link applies to you directly. I wasted a lot of time trying to clear this Diagnostic Trouble Codes (DTC) through the Global Diagnostic System 2 (GDS2) application and attempts to get rid of it by using the Clear Secured High Voltage DTCs option did not work either. In the end, the only way to dump this code is to re-program the 'Hybrid Powertrain Control Module 2' at the dealer or using ACDelco's TIS2Web internet-subscription service that gives you access to Service Programming System (SPS) in addition to other toos like GDS2. If some of these terms throw you for a loop, just know the dealership uses handheld devices and hardware dedicated for this job and we will be using software implementations of them using an OBD device called the VCX Nano and your laptop/PC.
Before we start, you need to make sure you have the GDS2 compatible VCX Nano OBD connector I mentioned earlier which I paid $108. Additionally, ensure you've already fixed your radiator leak and/or faulty sensor and your battery coolant system has been bleed and refilled if necessary. Plug in VCX Nano to your computer and make sure you have run the VX Manager and installed the J2534 Passthrough driver which will be needed for SPS.
Next, you will need a subscription at ACDelco's website. Currently there is a $40 subscription to the "Vehicle Programming Software" which includes a 24 month access to program all modules for a single VIN:

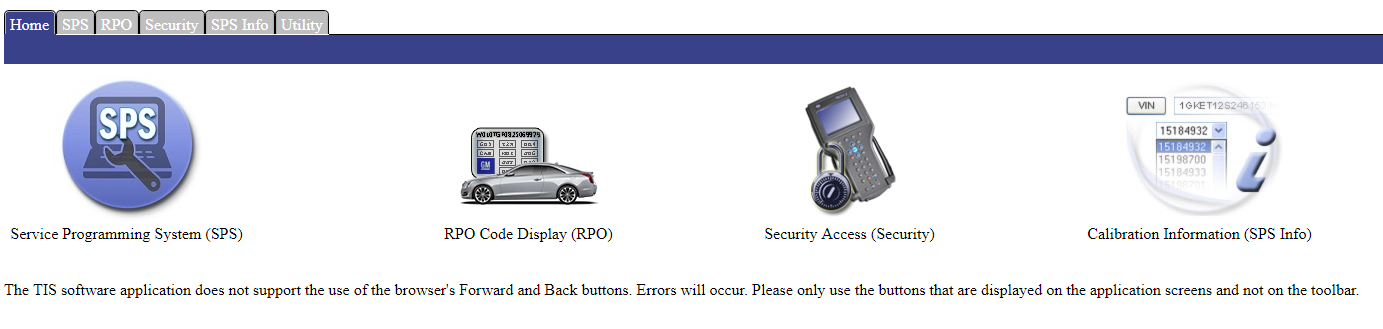
Once you've created an acount at the ACDelco website and purchased a license, you can click "View" to the right under Actions and click on your VIN or 'Add VIN' if this is your first time. This will open upthe TIS2Web website, click through the prompts until you get to the screen like this:
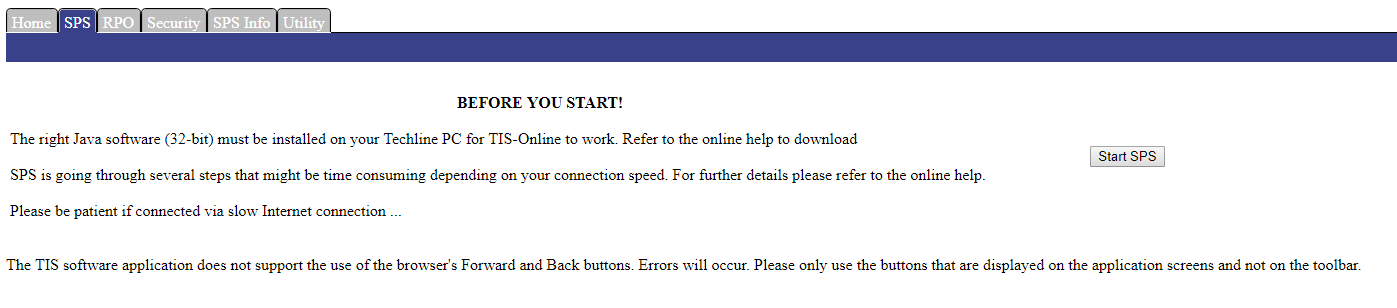
From here you need to select SPS and acknowledge any warnings and click "Start SPS" on the next screen and run the java applet.
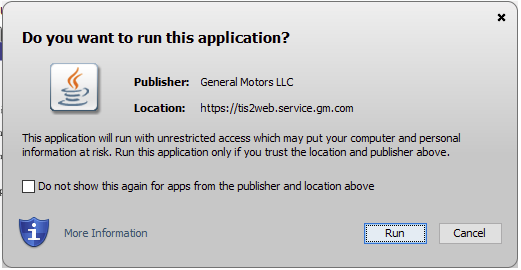
If your Java settings are configured correctly, you'll get an option to Run the Java application:
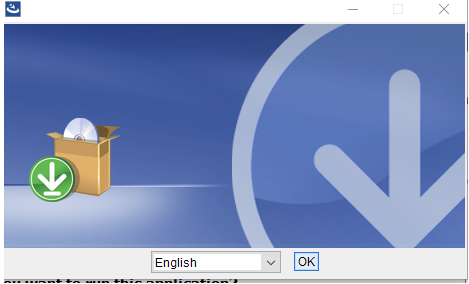
Which will lead to an installation process for some TIS2Web software:
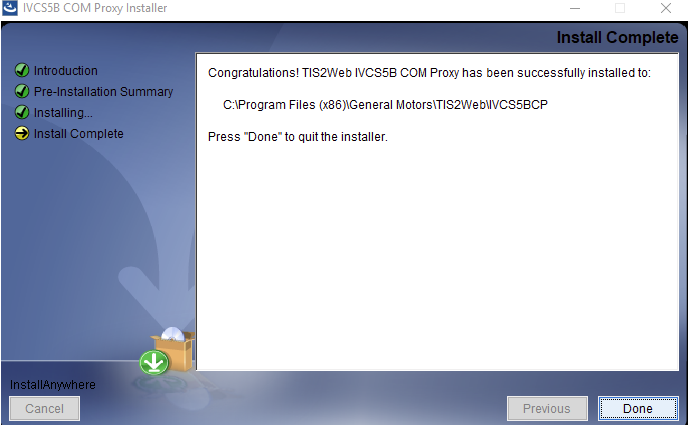
Once the first wizard is done installing, you'll get a prompt to install some more. I just accepted the defaults:
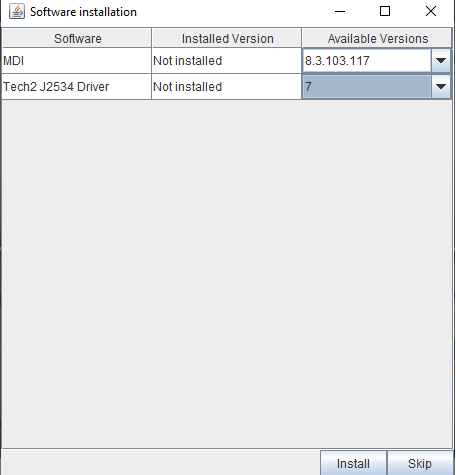
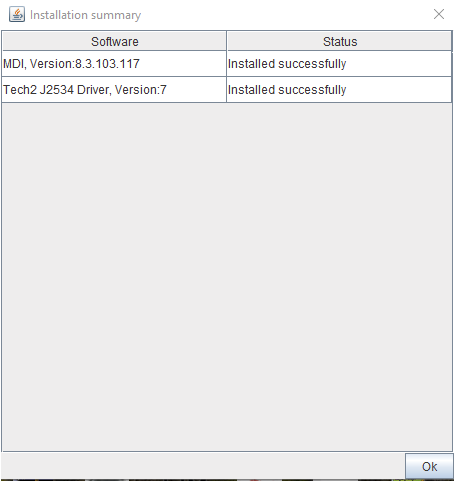
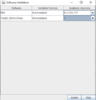
You'll be prompted for Administrative rights multiple times and eventually it will say installed successfully. Go ahead and click okay and finally this will bring up the SPS software:
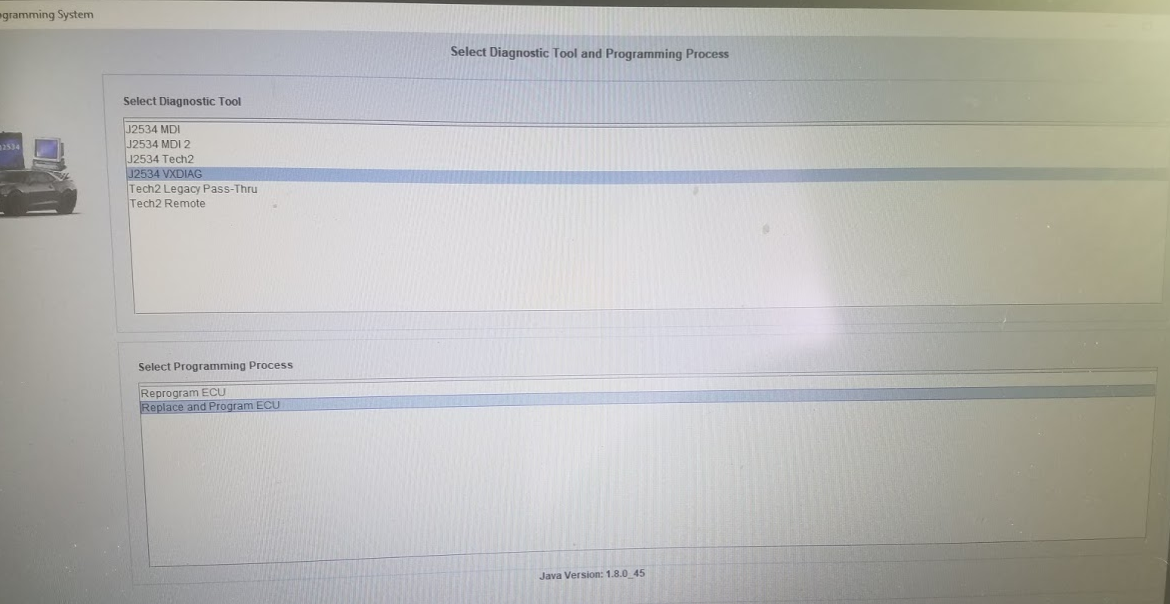
You'll notice the J2534 VCDIAG option, select this and Replace and Program ECU and click next:
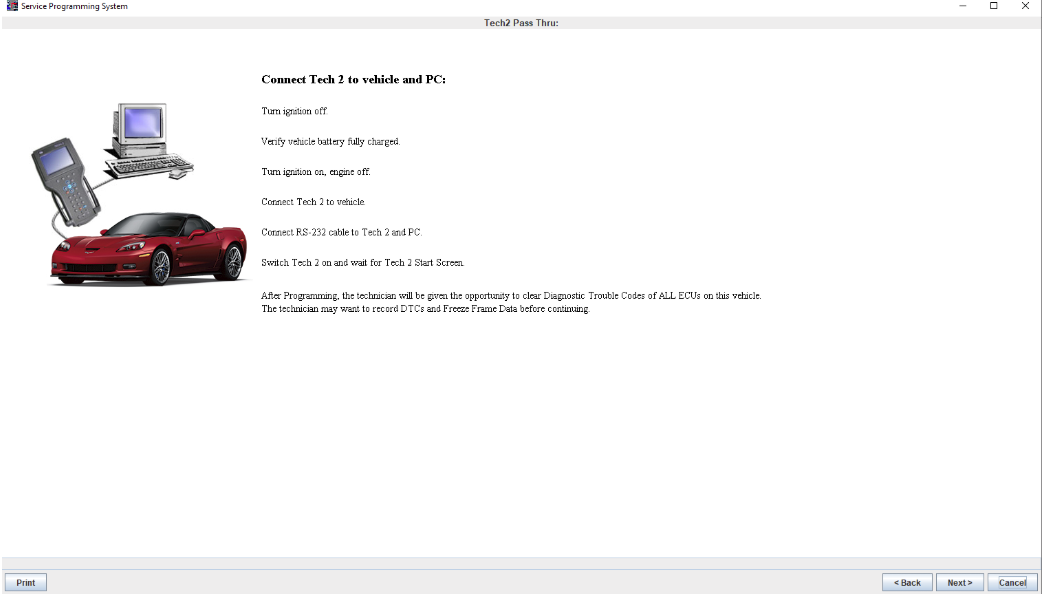
Now it will begin to use the OBD connection so put your vehicle into Service Mode by holding the start button for 10 seconds until the car turns on and click next:
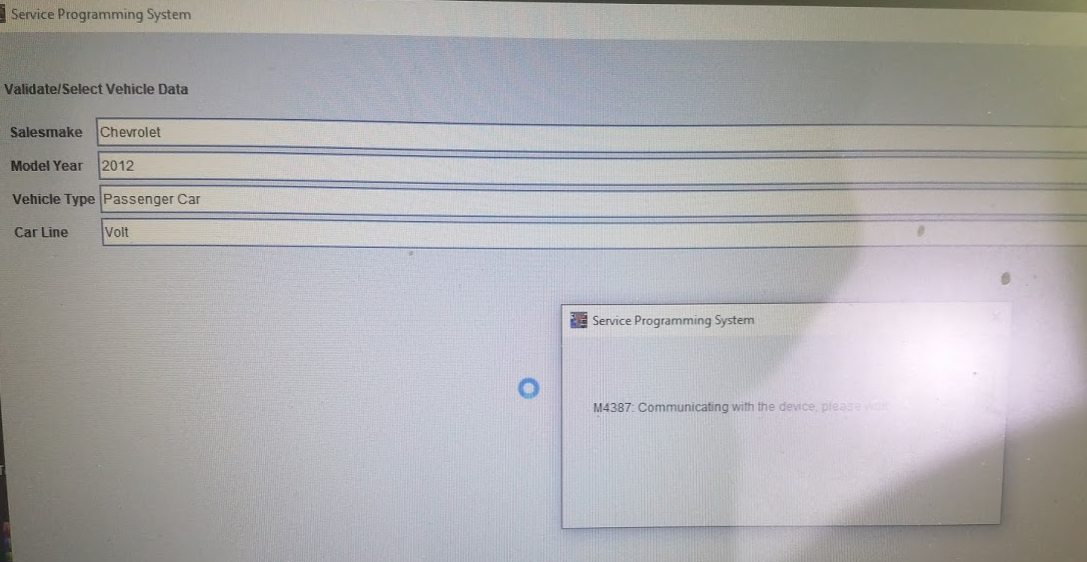
If everything is working, you will need to select make, model and year of your vehicle and it will ask you to confirm the VIN:
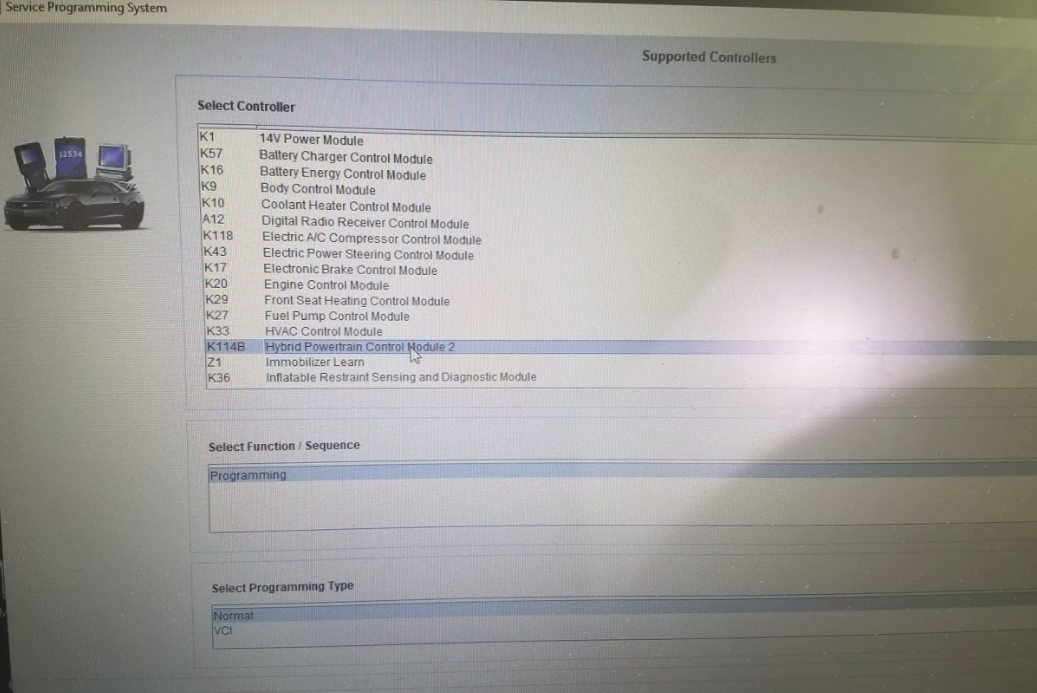
Now we can pick the K114B Hybrid Powertrain Control Module 2, then click Programming/Normal:
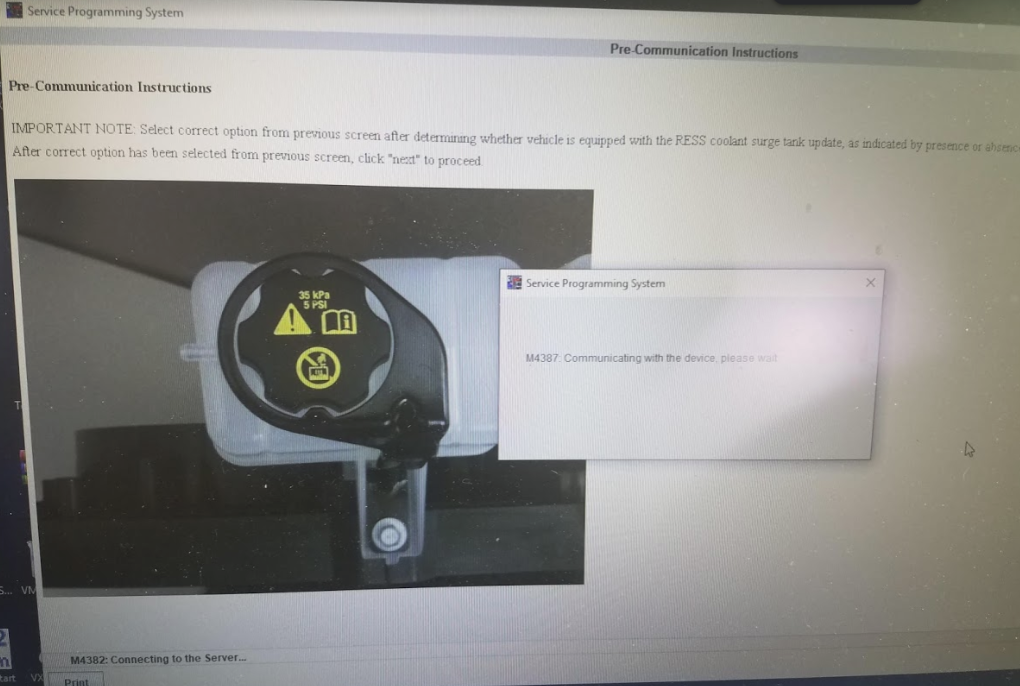
Since my car didn't have the coolant security lock on the coolant cap, I chose without RESS coolant tank update:
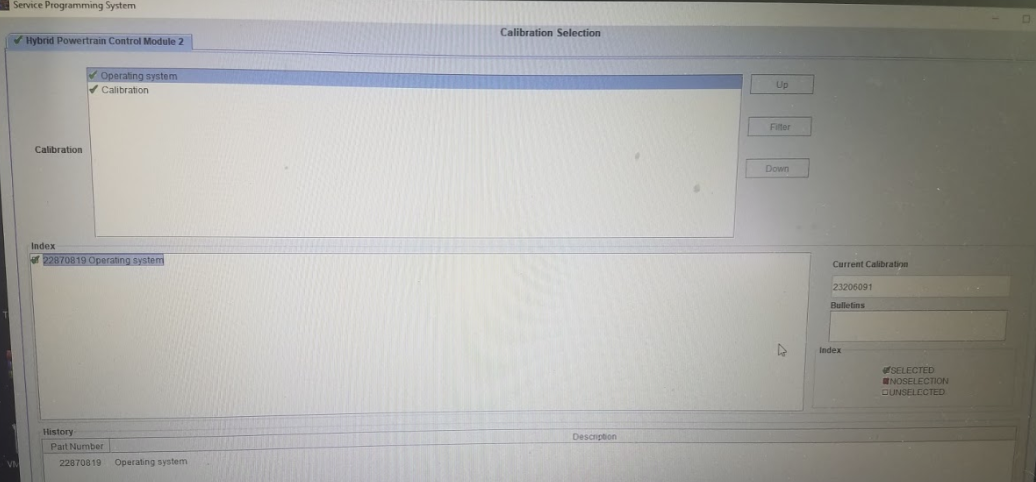
Then I chose Operating System:
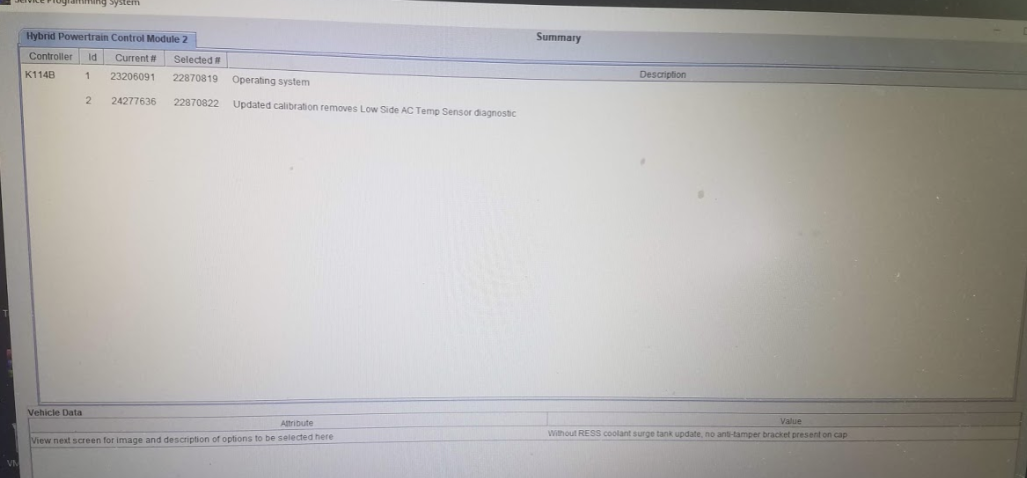
It will list a summary of what was being updated. Some of this may not have been necessary, I cared primarily about the OS programming:
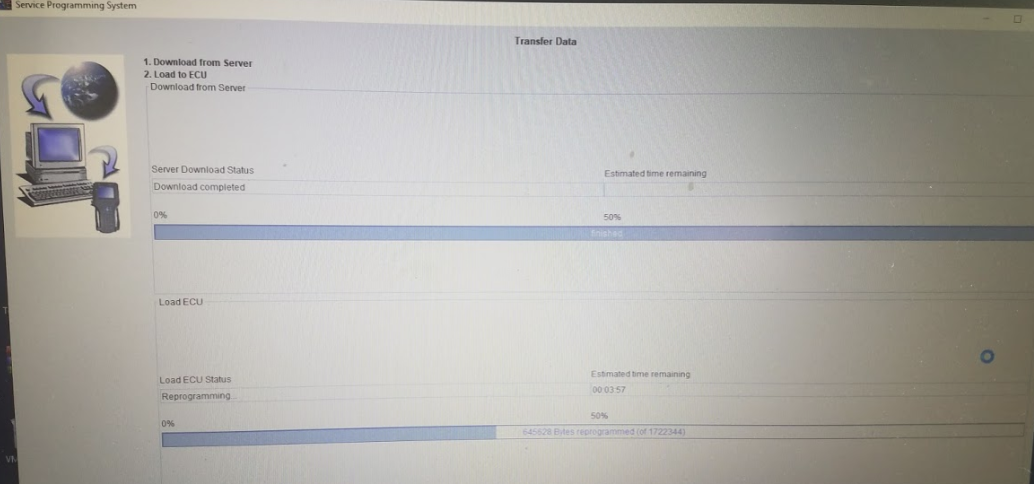
Now it will downlaod the update and program the module. Do not disconnect any cables or turn off your computer:
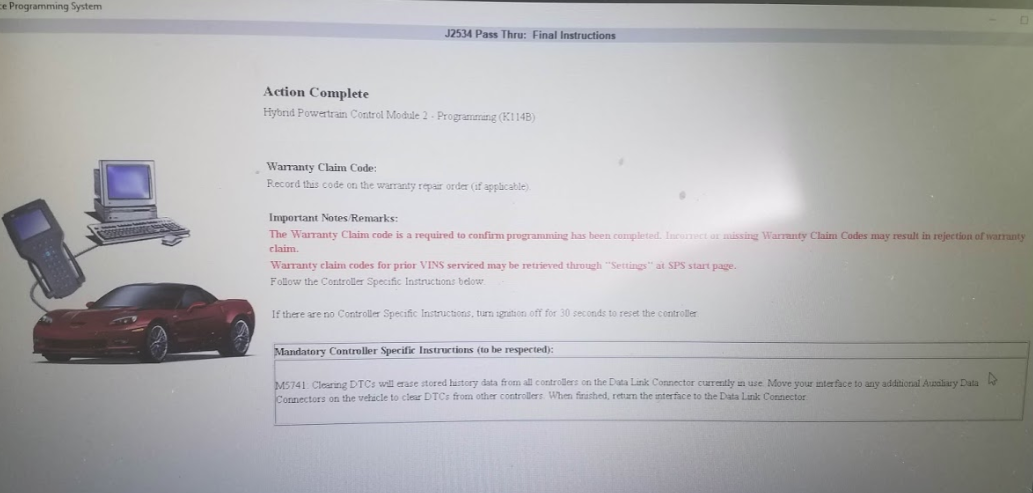
Once complete, it will inform you to clear the DTCs and turn of the ignition for 30 seconds:
After this I plugged the car in and voila!

For those of you who are getting this code as a false positive because of issues with the sensor itself going bad, this guide will be useful to you. Although there has been some instruction available online, none of it was particularly detailed so hopefully you find this helpful. For anyone like myself whose SHVCS warning has occurred for good reason, this guide and the others I will link applies to you directly. I wasted a lot of time trying to clear this Diagnostic Trouble Codes (DTC) through the Global Diagnostic System 2 (GDS2) application and attempts to get rid of it by using the Clear Secured High Voltage DTCs option did not work either. In the end, the only way to dump this code is to re-program the 'Hybrid Powertrain Control Module 2' at the dealer or using ACDelco's TIS2Web internet-subscription service that gives you access to Service Programming System (SPS) in addition to other toos like GDS2. If some of these terms throw you for a loop, just know the dealership uses handheld devices and hardware dedicated for this job and we will be using software implementations of them using an OBD device called the VCX Nano and your laptop/PC.
Before we start, you need to make sure you have the GDS2 compatible VCX Nano OBD connector I mentioned earlier which I paid $108. Additionally, ensure you've already fixed your radiator leak and/or faulty sensor and your battery coolant system has been bleed and refilled if necessary. Plug in VCX Nano to your computer and make sure you have run the VX Manager and installed the J2534 Passthrough driver which will be needed for SPS.
Next, you will need a subscription at ACDelco's website. Currently there is a $40 subscription to the "Vehicle Programming Software" which includes a 24 month access to program all modules for a single VIN:
Once you've created an acount at the ACDelco website and purchased a license, you can click "View" to the right under Actions and click on your VIN or 'Add VIN' if this is your first time. This will open upthe TIS2Web website, click through the prompts until you get to the screen like this:
From here you need to select SPS and acknowledge any warnings and click "Start SPS" on the next screen and run the java applet.
If your Java settings are configured correctly, you'll get an option to Run the Java application:
Which will lead to an installation process for some TIS2Web software:
Once the first wizard is done installing, you'll get a prompt to install some more. I just accepted the defaults:
You'll be prompted for Administrative rights multiple times and eventually it will say installed successfully. Go ahead and click okay and finally this will bring up the SPS software:
You'll notice the J2534 VCDIAG option, select this and Replace and Program ECU and click next:
Now it will begin to use the OBD connection so put your vehicle into Service Mode by holding the start button for 10 seconds until the car turns on and click next:
If everything is working, you will need to select make, model and year of your vehicle and it will ask you to confirm the VIN:
Now we can pick the K114B Hybrid Powertrain Control Module 2, then click Programming/Normal:
Since my car didn't have the coolant security lock on the coolant cap, I chose without RESS coolant tank update:
Then I chose Operating System:
It will list a summary of what was being updated. Some of this may not have been necessary, I cared primarily about the OS programming:
Now it will downlaod the update and program the module. Do not disconnect any cables or turn off your computer:
Once complete, it will inform you to clear the DTCs and turn of the ignition for 30 seconds:
After this I plugged the car in and voila!
Attachments
-
 17.7 KB Views: 1,018
